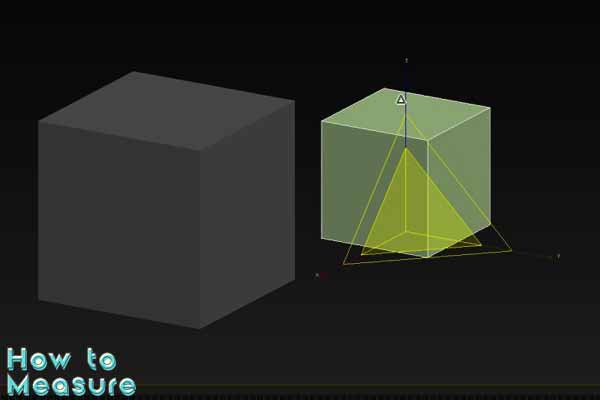
How can I measure distance in 3ds Max?
Measuring distance in 3ds Max can be done in several ways, depending on what you need to measure and how accurate you need the measurement to be. Here are a few methods:
- Measure Tool: The Measure tool is a simple and easy way to measure distance in 3ds Max. To use it, click the Measure button on the main toolbar or press the “M” key on your keyboard. Then, click and drag from one point to another in your scene to measure the distance between them. The Measure tool will display the space in the units set in your scene’s System Units Setup.
- Ruler Tool: The Ruler tool is another simple way to measure distance in 3ds Max. It allows you to measure the distance between two points and the length of curves and splines. To use it, go to the Create panel and click on the Shapes button. Then, select the Ruler shape and draw a line between the two points you want to measure. The line length will be displayed in the units set in your scene’s System Units Setup.
- Distance Constraint: The Distance Constraint tool is a more advanced method of measuring distance in 3ds Max. It allows you to set a specific distance between two objects or points and will adjust the position of the objects to maintain that distance. Select the two things or topics you want to measure, then go to the Animation menu and choose Constraints > Distance. Set the desired length in the Constraint Parameters window and click OK.
- Snapping: Snapping is a valuable feature in 3ds Max that can help you measure distances more accurately by snapping objects and points to the grid or other things. Go to the main toolbar and click the Snap button to enable snapping. Then, select the desired snapping option (e.g., Grid Points) and adjust the Snap settings to your liking. When you move an object or point while snapping is enabled, it will snap to the nearest grid point or thing, making it easier to measure distances accurately.
These are just a few methods of measuring distance in 3ds Max, but many other tools and techniques are available depending on your specific needs and workflow. Using these methods, you can ensure that your 3D models and scenes are accurate and precise, making them more professional-looking and realistic.
What are the different ways to measure distance in 3ds Max?
There are several ways to measure distance in 3ds Max, depending on what you need to measure and how accurately you need the measurement to be. Here are some of the most common methods:
- Measure Tool: The Measure tool is a simple and easy way to measure distance in 3ds Max. To use it, simply click the Measure button on the main toolbar or press the “M” key on your keyboard. Then, click and drag from one point to another in your scene to measure the distance between them. The Measure tool will display the space in the units set in your scene’s System Units Setup.
- Ruler Tool: The Ruler tool is another simple way to measure distance in 3ds Max. It allows you to measure the distance between two points and the length of curves and splines. To use it, go to the Create panel and click on the Shapes button. Then, select the Ruler shape and draw a line between the two points you want to measure. The line length will be displayed in the units set in your scene’s System Units Setup.
- Distance Constraint: The Distance Constraint tool is a more advanced method of measuring distance in 3ds Max. It allows you to set a specific distance between two objects or points and will adjust the position of the objects to maintain that distance. Select the two things or topics you want to measure, then go to the Animation menu and select Constraints > Distance. Set the desired length in the Constraint Parameters window and click OK.
- Tape Helper: The Tape Helper is a specialized tool in 3ds Max that allows you to measure distances between objects or points. It creates a line with endpoints that snap to objects or issues in your scene, making it easier to measure distances accurately. To use it, select the Helpers tab in the Create panel and select the Tape Helper. Then, click and drag in your scene to create the tape and snap its endpoints to the desired objects or points.
- Snapping: Snapping is a valuable feature in 3ds Max that can help you measure distances more accurately by snapping objects and points to the grid or other things. Go to the main toolbar and click the Snap button to enable snapping. Then, select the desired snapping option (e.g., Grid Points) and adjust the Snap settings to your liking. When you move an object or point while snapping is enabled, it will snap to the nearest grid point or thing, making it easier to measure distances accurately.
These are just a few methods available for measuring distance in 3ds Max. Using these tools and techniques ensures that your 3D models and scenes are accurate and precise, making them more professional-looking and realistic.
How to measure the length of a curve in 3ds Max?
Measuring the length of a curve in 3ds Max can be helpful for various purposes, such as determining the amount of material needed for a 3D printing project or calculating the length of a wireframe for an animation. Here’s how to measure the size of a curve in 3ds Max:
- Create your curve: Start by creating the curve you want to measure. This can be done using various tools in 3ds Max, such as the Line or Spline tools.
- Convert the curve to an editable spline: Once created, you must convert it to an editable spline to access the length measurement feature. To do this, right-click on the curve and select “Convert to > Convert to Editable Spline.”
- Access the length measurement tool: With the curve now an editable spline, you can access the length measurement tool by selecting the “Measure” tool in the main toolbar or pressing the “M” key on your keyboard.
- Measure the curve length: With the Measure tool active, hover over the curve until you see a blue marker appear at the curve’s starting point. Click on this point to start the measurement, then move your cursor along the curve to measure its length. You’ll see the curve length displayed in the Measure tool’s Units area.
- Convert the measurement to the desired units: By default, the length measurement will be displayed in the units set in your scene’s System Units Setup. If you need to convert the measurement to a different unit of measurement (e.g., millimeters to inches), you can do so by using the Units Converter tool in 3ds Max. This tool can be accessed by right-clicking the measurement value in the Measure tool and selecting “Convert Units.”
By following these steps, you can easily measure the length of a curve in 3ds Max and ensure that your 3D models and scenes are accurate and precise.
How to measure the distance between two points in 3ds Max?
Measuring the distance between two points in 3ds Max can be helpful for various purposes, such as positioning objects accurately in a scene or ensuring that dimensions are correct in a 3D model. Here’s how to measure the distance between two points in 3ds Max:
- Select the Measure tool: To measure the distance between two points in 3ds Max, you’ll need to use the Measure tool. This tool can be found in the main toolbar, or you can access it by pressing the “M” key on your keyboard.
- Click on the starting point: With the Measure tool selected, click on the starting point of the distance you want to measure in your scene. This will create a marker at that point.
- Click on the ending point: Next, click on the ending point of the distance you want to measure. This will create a second marker at that point and display the distance between the two points in the Measure tool.
- Adjust the measurement units: By default, the measurement will be displayed in the units set in your scene’s System Units Setup. If you need to adjust the measurement units (e.g., from centimeters to inches), you can do so by selecting the measurement value in the Measure tool and using the Units Converter tool, which can be accessed by right-clicking on the measurement value.
- Repeat as necessary: If you need to measure the distance between additional points in your scene, repeat steps 2-4 for each new pair of points.
Following these steps, you can easily measure the distance between two points in 3ds Max and ensure that your 3D models and scenes are accurate and precise.

How to measure the height of an object in 3ds Max?
Measuring the height of an object in 3ds Max can be helpful for various purposes, such as determining the size of an object to other objects in your Scene or ensuring that the proportions of a 3D model are correct. Here’s how to measure the height of an object in 3ds Max:
- Select the object: To measure the height of an object, you’ll first need to select it in your Scene. You can do this by clicking on the thing in the viewport or selecting it from the Scene Explorer.
- Access the Measure tool: Once you have the object selected, you can access the Measure tool by selecting it from the main toolbar or by pressing the “M” key on your keyboard.
- Choose the appropriate measurement type: In the Measure tool, several different measurement types are available. Select the “Height” option to measure your object’s height.
- Position the measurement markers: With the “Height” measurement type selected, position the measurement markers on your object by clicking on the bottom and top points of the object’s height. You’ll see a line between the two points, representing the object’s height.
- Adjust the measurement units: By default, the measurement will be displayed in the units set in your Scene’s System Units Setup. If you need to adjust the measurement units (e.g., from centimeters to inches), you can do so by selecting the measurement value in the Measure tool and using the Units Converter tool, which can be accessed by right-clicking on the measurement value.
- Repeat as necessary: If you need to measure the height of additional objects in your Scene, repeat steps 1-5 for each new thing.
By following these steps, you can easily measure the height of an object in 3ds Max and ensure that your 3D models and scenes are accurate and precise.
How to use the measure tool in 3ds Max?
The Measure tool in 3ds Max is powerful and allows you to measure distances, angles, and heights in your 3D scene. Here’s how to use the Measure tool in 3ds Max:
- Select the Measure tool: The Measure tool can be found in the main toolbar, or you can access it by pressing the “M” key on your keyboard.
- Choose the appropriate measurement type: With the Measure tool selected, choose the proper one from the dropdown menu in the Measure tool options. The available measurement types include Distance, Angle, Height, and more.
- Position the markers: Depending on the selected measurement type, position the features in your scene by clicking on the appropriate points. For example, to measure the distance between two points, click on the starting point and then click on the ending point. To calculate an angle, position the markers at the vertex and the two rays of the angle.
- View the measurement value: Once you’ve positioned the measurement markers, the measurement value will be displayed in the Measure tool. The measurement value will be displayed in the units set in your scene’s System Units Setup.
- Adjust the measurement units: If you need to adjust the measurement units (e.g., from centimeters to inches), you can do so by selecting the measurement value in the Measure tool and using the Units Converter tool, which can be accessed by right-clicking on the measurement value.
- Repeat as necessary: If you need to measure different distances, angles, or heights in your scene, select the appropriate measurement type and repeat steps 3-5.
By using the Measure tool in 3ds Max, you can easily measure distances, angles, and heights in your 3D scene, helping you to ensure that your 3D models and locations are accurate and precise.
How to set units of measurement in 3ds Max?
Setting the correct units of measurement is an essential step in creating accurate 3D models in 3ds Max. Here’s how to set the units of measurement in 3ds Max:
- Open the System Units Setup dialog: Select Customize > Units Setup from the main menu to open the System Units Setup dialog.
- Choose the desired display unit: In the System Unit Setup dialog, choose the desired display unit from the Display Unit Scale dropdown menu. This sets the teams that will be used to display measurements in 3ds Max.
- Choose the desired system unit: Choose the desired system unit from the System Unit Scale dropdown menu. This sets the base unit of measurement used in the 3D scene.
- Choose the desired system unit type: Choose the desired system unit type from the System Unit Type dropdown menu. This sets the type of measurement used in the 3D scene, such as length or time.
- Set the default units for new scenes: If you want to use these units as the default for recent locations, click the “Save as Default” button.
- Adjust existing scenes: If you have existing locations created with a different unit of measurement, you can adjust the units of measurement for that scene by selecting “File” from the main menu, then “System Units.”
By following these steps, you can easily set the correct units of measurement for your 3ds Max scene, helping you to create accurate and precise 3D models.
How to snap to grid in 3ds Max for accurate measurements?
Snapping to the grid in 3ds Max is valuable for ensuring accurate measurements in your 3D models. Here’s how to snap to the grid in 3ds Max:
- Enable the grid: If the grid is not already visible, you can enable it by selecting “Views” from the main menu, then “Grids and Snaps,” and then “Grids.” Make sure the “Show Grid” option is checked.
- Adjust the grid settings: To adjust the grid settings, go to “Views” > “Grids and Snaps” > “Grids” and select “Configure Grid.” Here, you can adjust the size of the grid squares and the number of subdivisions per square.
- Enable snap to the grid: To enable snap to grid, go to “Views” > “Grids and Snaps” > “Grids” and check the “Snap to Grid” option. You can also press the “S” key on your keyboard to toggle snap to the grid on and off.
- Move objects: With snap to grid enabled, you can move things in your scene by clicking and dragging them. The object will automatically snap to the closest grid point.
- Adjust grid snap settings: To adjust the grid snap settings, go to “Views” > “Grids and Snaps” > “Grids” and select “Grid and Snap Settings.” Here, you can adjust the grid snap increment, which determines the distance between grid points that objects will snap to.
By snapping to the grid in 3ds Max, you can ensure accurate measurements and precise alignment of objects in your 3D models.
How to measure distance using the ruler tool in 3ds Max?
The ruler tool in 3ds Max is a quick and easy way to measure distances between two points in your 3D scene. Here’s how to use the ruler tool in 3ds Max:
- Activate the ruler tool: Select the “Measure Distance” tool from the main toolbar or press “Ctrl + X” on your keyboard.
- Select the starting point: Click on the starting point of the distance you want to measure. A red circle will appear at the selected topic.
- Select the endpoint: Click on the endpoint of the distance you want to measure. A blue circle will appear at the selected point, and a red line will connect the two points.
- View the distance measurement: The distance measurement will be displayed in the measurement dialog box at the bottom of the 3ds Max window.
- Adjust the measurement display units: To adjust the display units of the measurement, go to “Customize” > “Units Setup” from the main menu and select the desired units.
- Hide the measurement: To hide the measurement, click on the “Clear” button in the measurement dialog box.
Using the ruler tool in 3ds Max, you can quickly and easily measure distances between two points in your 3D scene, ensuring accuracy and precision in your modeling work.
How to use the distance constraint tool in 3ds Max?
The distance constraint tool in 3ds Max is powerful and allows you to maintain a set distance between two objects or points in your 3D scene. Here’s how to use the distance constraint tool in 3ds Max:
- Select the objects to be constrained: Select the two points between which you want to maintain a set distance.
- Open the constraint menu: Right-click on one of the selected objects to open the context menu, then select “Constraints” and “Distance Constraint.”
- Set the distance value: In the distance constraint dialog box, enter the desired distance value that you want to maintain between the two objects or points.
- Adjust the constraint parameters: You can adjust the constraint parameters such as the damping, relaxation, and other options to fine-tune the behavior of the constraint.
- Preview and apply the constraint: Click “Preview” to see how the constraint affects the movement of the objects, and then click “Apply” to apply the constraint.
- Adjust the distance constraint: You can adjust the distance constraint at any time by selecting the constrained objects and opening the distance constraint dialog box.
Using the distance constraint tool in 3ds Max, you can maintain a set distance between two objects or points in your 3D scene, ensuring accurate and precise modeling work.
Final thoughts
In conclusion, measuring distance accurately is crucial in 3D modeling to create precise and realistic models. In 3ds Max, several tools and techniques are available to measure distance, including the measure tool, ruler tool, distance constraint tool, and snapping to grid. By mastering these tools, 3D artists can ensure the accuracy and precision of their models, resulting in high-quality and realistic final products. Whether you are a beginner or an experienced 3D artist, mastering the different ways to measure distance in 3ds Max will help you achieve your modeling goals.