In the realm of shooting sports, optics, and firearm accuracy, the term “sight height” emerges as a crucial element that many enthusiasts, hobbyists, and professionals pay keen attention to. Yet, for those unfamiliar with the intricacies of firearms and their associated equipment, the term might sound arcane. What does it refer to, and why is it so significant in the context of shooting? Sight height isn’t just about how high a sight or scope is mounted on a firearm; it plays a pivotal role in ensuring shots are precise and on target. In this article, we’ll delve deep into the concept of sight height, unraveling its definition, importance, and the science behind it. Whether you’re a seasoned shooter or a curious novice, understanding sight height can enhance your knowledge and appreciation for the art and science of shooting.
What is Sight Height?
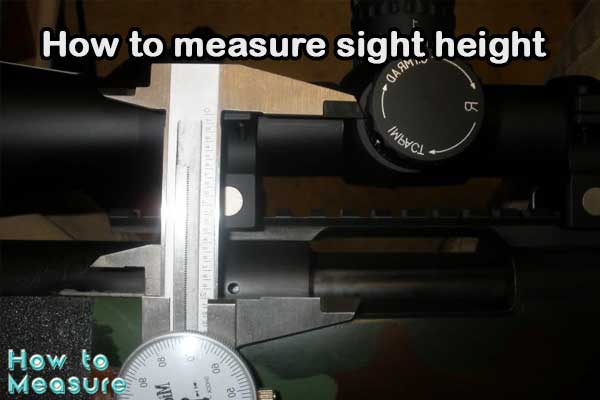
Sight height refers to the vertical distance between the center of a firearm’s bore and the center of its sight, whether that be an iron sight, a red dot sight, or a scope. It’s a measurement typically taken in inches or millimeters and is especially vital when zeroing or calibrating a firearm for specific distances. The height determines how the bullet’s trajectory will intersect with the point of aim at given ranges.
When a firearm is shot, the bullet doesn’t travel in a straight line; it follows a curved trajectory influenced by factors like gravity. As the bullet exits the barrel, it begins to drop. The sight height helps shooters make adjustments to their aim, ensuring that the bullet intersects with the sight line at the desired distance. Different sight heights can lead to varied points of impact, even if the shooter is aiming at the same spot. Thus, knowing and adjusting for sight height is fundamental for shooting accuracy.
Tools Needed to Measure Sight Height
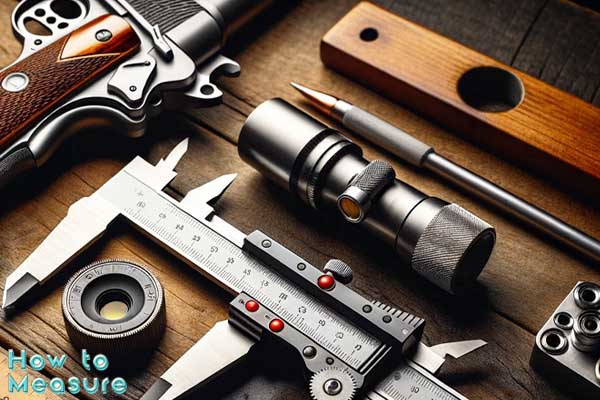
Measuring sight height accurately is pivotal to ensure optimal firearm performance. While the concept is straightforward, having the right tools on hand can make the process more precise and hassle-free. Here’s a list of tools and equipment that can assist you in determining the sight height of your firearm:
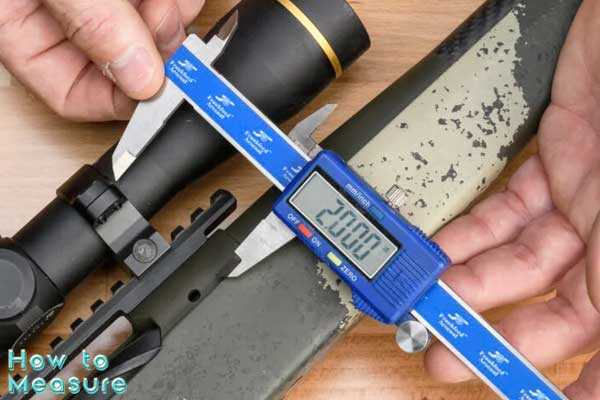
- Calipers: A digital or dial caliper is the most commonly used tool for this task. They offer precision and can measure the distance between the firearm’s bore and the sight with ease.
- Straight Edge: A flat ruler or another straight-edged tool can be used in conjunction with a caliper to get an accurate measurement, especially for rifles with larger or more pronounced sights.
- Bore Laser: A bore laser fits into the chamber or muzzle of the firearm and emits a straight laser beam. By measuring the distance between this beam and the center of the sight, you can determine the sight height.
- Gun Vise: Holding your firearm steady is essential for accurate measurement. A gun vise, while not strictly necessary, can ensure the firearm remains stationary, making the process easier and more accurate.
- Level: To make sure the firearm is perfectly horizontal when taking measurements, a small bubble level can be handy.
- Marking Tool: A non-permanent marker or chalk can help mark points of reference, especially if you’re measuring alone and need to keep track of where you’ve measured.
- Boresight Tool: While primarily used for aligning sights and scopes with the firearm’s bore, a boresight tool can also aid in measuring sight height, especially if it comes with a laser feature.
- Tape Measure or Ruler: For quick checks or if calipers aren’t available, a tape measure or ruler can serve the purpose, though they may not be as precise.
Remember, the key to a precise sight height measurement is ensuring that both the firearm and the measuring tool are stable. Consistency in how measurements are taken, especially if you’re measuring multiple firearms, is crucial to maintain accuracy across the board.
Step-by-Step Guide to Measuring Sight Height
Understanding how to measure sight height accurately can drastically improve shooting accuracy and calibration. Here’s a comprehensive guide to help you get an accurate sight height measurement, whether you’re working with a firearm or a bow.
Preparing Your Firearm or Bow
- Safety First: Before you start, ensure the firearm is unloaded or, in the case of a bow, unstrung. Always practice safe handling protocols.
- Clean and Check: Ensure that the bore of the firearm or the string and arrow path of the bow is free from obstructions or debris.
- Secure Position: If possible, place the firearm or bow in a vise or a stable platform to hold it steady during the measurement process. Ensure it’s clamped gently so as not to damage the equipment.
- Align the Sights: If your firearm or bow has adjustable sights, set them to a standard or middle position. This provides a baseline for measurements.
Ensuring a Level Setup
- Use a Level: Place a small bubble level on a flat section of the firearm or bow to ensure it’s perfectly horizontal. Adjust as necessary.
- Check the Surface: Ensure that the table or platform you’re working on is level as well. Any incline can throw off measurements.
- Consistent Positioning: Make sure that the firearm or bow remains in the same position throughout the measurement process to ensure consistency.
Taking the Measurement
- Using Calipers: Extend the caliper’s jaws. Place one end on the center of the bore (for firearms) or where the arrow rests (for bows). The other end should touch the center of the sight. Read the measurement.
- Straight Edge Assistance: If using a straight edge with a caliper, position the straight edge parallel to the bore or arrow path. The caliper can then measure the distance from this straight edge to the sight’s center, which can be particularly useful for sights that protrude significantly.
- Bore Laser Method: If using a bore laser, insert it into the firearm’s chamber or muzzle. Turn it on, and use a ruler or caliper to measure the distance from the laser point to the center of the sight.
- Document Your Measurement: Once you’ve taken the measurement, record it. If you have multiple firearms or bows, it’s a good practice to maintain a log.
- Repeat for Verification: To ensure accuracy, consider taking the measurement multiple times and calculating an average.
By following these steps diligently, you’ll have an accurate sight height measurement, which can be instrumental in calibrating your equipment for optimal performance.
Impact of Sight Height on Ballistics
Sight height, the vertical distance between a firearm’s bore center and sight center, significantly influences bullet trajectory. When a bullet is fired, it follows a curved path due to gravity. This trajectory has two intersecting points with the sight line, known as the “near zero” and “far zero.” A larger sight height means the bullet must rise at a steeper angle to intersect with the intended target distance. Conversely, a closer sight to the bore brings the two intersection points nearer to each other. In short, sight height is crucial for marksmen aiming for precision, as it dictates how a bullet will hit relative to the aimed point.
Common Mistakes When Measuring Sight Height
- Not Ensuring Safety: Failing to ensure the firearm is unloaded before starting is a grave oversight. Safety should always be the first priority.
- Inconsistent Positioning: Changing the position of the firearm or bow during measurement can lead to inconsistent readings. Always ensure the equipment remains stable and in the same orientation.
- Not Using a Level Surface: Overlooking the importance of a level surface can skew measurements. Always check that both the firearm or bow and the working surface are level.
- Using Inaccurate Tools: Employing bent rulers, worn-out calipers, or any instrument not in good condition can produce inaccurate results.
- Rushing the Process: Hasty measurements often lead to errors. Taking one’s time ensures accuracy.
- Misreading Instruments: Especially with analog tools like dial calipers, misinterpretations can occur. Always double-check readings.
- Not Averaging Multiple Measurements: Relying on a single measurement rather than taking multiple readings and averaging them can introduce errors.
- Overlooking Parallax Errors: When using calipers or rulers, not having your eye level directly above the measurement point can introduce parallax errors.
- Not Measuring from the Bore’s Center: Measuring from the edge of the bore rather than the center is a common oversight. Always aim for the center for precise readings.
- Forgetting Environmental Factors: While often negligible, factors like extreme temperatures can affect some measurement tools. It’s always good to be aware of your environment.
Avoiding these common pitfalls can help ensure that sight height measurements are accurate, ensuring better shooting accuracy and overall firearm performance.
Conclusion
Measuring sight height is more than a simple act of running a ruler across a firearm or bow; it’s an integral step in ensuring optimal performance and accuracy when aiming at a target. An accurate understanding of sight height directly affects the ballistic trajectory and, by extension, the precision of each shot. As we’ve explored, even minor discrepancies in this measurement can lead to significant deviations downrange. By being mindful of common mistakes and following a meticulous approach, shooters can confidently calibrate their equipment for the best possible results. Whether you’re a seasoned marksman or a beginner, mastering the art of measuring sight height is a foundational skill that can elevate your shooting prowess to new heights.